If you’ve been a reader of EngineLabs for a while, you might recall a project we introduced a long time ago, dubbed LS5.0. Unfortunately, that project has been very slow to come alive, largely thanks to the events and subsequent repercussions of 2020. However, now, all the parts are here, my shop is ready, and we’re getting down to business.
A quick refresher on the LS5.0 Project for everyone. The whole premise for the project came from the early behind-the-scenes discussions for the second LS vs. Coyote shootout series. It’s a five-liter LS engine being built loosely around the original LS vs. Coyote Shootout ruleset. We hypothesized that a 5.0-liter LS engine could compete with the 5.0-liter Coyote in the test and wanted to prove it.
We then modeled the engines in engine simulation software and had some of the biggest brains in the industry look over the results, which is really what helped the project idea turn into an actual engine. Now, we’re done talking, it’s time to put torque to threads, and turn all these awesome parts into a real engine. This first installment is all about the short-block.

The core LY2 was no doubt in rough shape. But we’re visionaries; we can see what is possible through the ick.
The Core Of The Matter
For the base of this build, we considered several options. The first was an aftermarket block, but the problem is, they all start out with way too much bore for us to make 5.0 liters without using an expensive custom crankshaft. That would kill any hopes we have of sticking to the original LS vs. Coyote budget, and kind of kill the vibe of the project. See, this is something that anyone can put together themselves in their garage.
That meant we were limited to the 4.8/5.3 family of blocks. The good news is, there are plenty of options available there, and the blocks are relatively robust, especially when compared to other factory blocks. After some discussion, we decided to go with a Gen-IV variant for the 58-tooth reluctor wheel and better rods (in case we opted for them). Looking at the Gen-IV 4.8-liter engines, the LY2 stood out as fitting the bill. Besides checking all of the rotating assembly options, it also has no AFM system and comes with the venerable 799 cylinder heads.

Beck Racing Engines got the block looking great again and machined everything to our specs.
You would think that finding a core engine would be easy, but in late 2019, finding a Gen-IV engine for cheap, let alone the exact LY2 we were after proved to be a challenge. Then, we reached out to contacts over at Reviva Performance, and asked them if their engine-rebuilding sister company, Pilot Engines, might have a line on a LY2 core. After explaining we literally just wanted to buy an untouched core, which is very out of the norm for them, they checked inventory and found they had two LY2 cores waiting to be processed. We were in business.
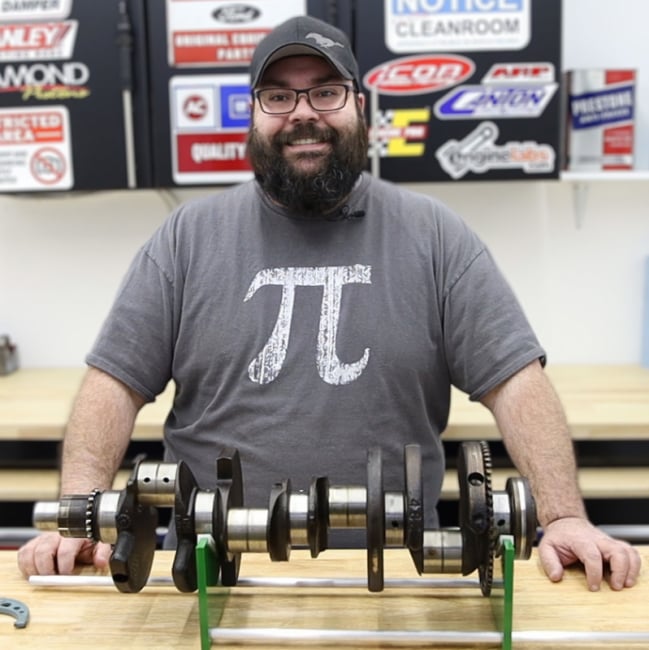
Once we got the engine, we tore it down and sent the parts off to their respective machine shops. Beck Racing Engines got the block cleaned up, Magnafluxed, bored and honed to our desired 3.858 inches, align bored the mains, cleaned up the decks, and checked all the lifter bores. The crank and all of our aftermarket rotating assembly components went to CWT Industries. You might see that name and think, “aren’t they the company that makes balancing machines?” Yes, they are. Not only did they cut a keyway and balance our OEM crank, Randy Neal gave us a three-day crash course in everything balancing-related that was worth its weight in gold.
With everything from the original short-block back from the machine shops, we had a fully prepped block with a bore between the standard truck bore and an LS1 bore, and a perfectly balanced 3.268-inch-stroke crankshaft with a 58-tooth reluctor wheel on it.

Balancing any high-performance engine is important, but one that is going to be spun hard is even more critical.
6.300 H-Beam Connecting Rods
Putting together a parts list for LS5.0’s rods and pistons was a balance of off-the-shelf componentry with the right parts. The first challenge came with connecting rod length. Unlike the rest of the LS family that uses a 6.098-inch steel rod from the factory (the LS7’s titanium rods are 6.067 inches from the factory), the 4.8-liter engines use a longer 6.275-inch OEM rod, due to the short stroke and GM wanting to maintain piston compression height between truck engines.
That led us to a bit of a conundrum. If we used a standard set of off-the-shelf 6.125-inch LS connecting rods, we would need a .150-inch taller piston to make up the rod-length difference. Alternatively, we could use the stock Gen-IV rods that came out of the engine, and utilize an OEM compression height piston. Then, we found our Goldilocks option. Manley’s lineup of forged H-beam rods not only included the standard 6.098- and 6.125-inch options, but also a rod designed originally for the RHS tall-deck block, measuring 6.300 inches long. Doing some quick math, that is only .002 inch difference in compression height change than when swapping to a 6.125 rod in a standard-stroke LS (3.622 inches) combination.

The Manley RHS Tall-Deck H-beam rods (P/N: 14064R-8) are machined from 4340 steel forgings, before being heat-treated, stress-relieved, and shot-peened. After all that, every rod gets fully Magnaflux-checked for defects. The set of rods is advertised as weight-matched to plus or minus 1.5 grams, and we found them to be closer than that when balancing.
The H-beam design features the stock 2.225-inch big-end bore and a bronze-bushed .9281-inch wrist-pin bore (to nominally allow for .0011-inch of clearance with a .927-inch pin). The “R” suffix in the part number denotes that the rods have been fitted with upgraded 7/16-inch ARP2000 rod bolts, bringing the advertised horsepower range for these rods in a drag racing application to 900 horsepower.

Custom Diamond Racing Pistons
No matter how hard we tried, there was no getting around the need for custom pistons in this application. However, Diamond Pistons made it incredibly easy for us, thanks in part to the very minor shift in compression height. We supplied them with our actual bore size in the block, our desired compression ratio, what ring groove dimensions we wanted (read down below for how we decided on that), our actual deck height after machining, and answered a few other questions, and in only a few weeks, we had a box of pistons sitting on our doorstep.
Considering what the industry was dealing with at the time, it’s amazing that the only custom part in the engine, was the one that took the least time to arrive, actually coming in a week ahead of the quoted time. What they delivered was a 3.858-inch (nominal) piston with valve reliefs for our 2.02/1.58 valves, and a 7.6cc dome to bring our compression up to a nominal 11.3:1. The piston set also included a set of Trend Performance H-13 tool-steel .927-inch-diameter wrist pins with a 2.500-inch length and a .205-inch wall-thickness.

In addition to our custom size, the dome and valve reliefs were designed to meet our specific needs.
Total Seal Gas Ported Piston Rings
For our piston rings, we had to restrain ourselves. Having toured the Total Seal facilities multiple times, and having seen things I’m still not sure I can talk about, we know what Total Seal is capable of producing. If we went to them and asked for their highest-zoot, thinnest, trickest piston rings, with their most space-age coatings on them, I know I’d probably have them to my door in about a week, with a note saying, “Sorry for taking so long.”

But, that’s not what this project is about. While they do have a literal warehouse full of rings on the shelf, if you have an oddball bore size, that doesn’t usually see, say a NASCAR 0.7mm ring set being ordered, then they will have to make them custom for you. We’re trying really hard to stick to off-the-shelf here, so we thought ahead (which is a huge accomplishment). We gave Keith Jones our bore size, told him what we wanted to do, and our self-imposed constraints.
After about an hour, we had an email with the ring sizes to send to Diamond, and later that evening there was a shipping notification. We ended up with a 1.0mm AP Steel gas-ported top ring, coated in Total Seal’s C33 PVD Chromium Nitride. For the second ring, we used a 1.2mm reverse-taper cast iron piston ring. And for the bottom ring, we used a 3.0mm three-piece oil ring, with about 11.5 pounds of tension.

Numbers don’t convey just how thin a 1.0mm/1.2mm/3.0mm ring pack really is.
King pMax Kote Bearings
Since we are planning on revving the snot out of this engine, we knew we didn’t want to skimp on the bearings. For those, we turned to our friends at King Engine Bearings. After telling them what we wanted to do, they went all in, sending us their top-of-the-line LS main and rod bearings. The mains are standard-diameter XP-series tri-metal bearings, with the company’s patented polymer coating, pMax Kote, applied (P/N: MB5013XPC).

For the rod bearings, they sent bearings with all the same bells and whistles, as well as being narrowed (P/N: 807XPNC). However, when we ran into a small problem during assembly with bearing clearances, they rushed out a set of 807XPNC001 bearings, which are called “undersized” bearings, designed for crank journals that are slightly undersized, to provide a little less oil clearance. With our rod journals at the bottom of the tolerance, we used half of the .001-inch undersize bearing set along with half of the standard-size bearings, to bring our rod bearing clearances where we wanted.

Here is a chart of the available sizes in King’s engine bearing lineup. The easy breakdown is that they offer .001-inch undersize and .001-inch oversize bearings at standard, .010-under, and .020-under journal sizes, allowing for fine-tuning, even if your crank journals have been turned.
Balancing The Load
Since we are going to be spinning this engine higher than any other engine we’ve built, it only stands to reason that we went with a harmonic damper that is designed to do just that. So, we looked at what GM used on their factory COPO race engines, and saw that it was none other than an ATI Super Damper. Being careful not to fall into the trap of “me-tooism,” we reached out to ATI to confirm that the COPO part was actually right for our application here, to which they replied with a resounding, “Absolutely!”
The ATI Super Damper is an SFI 18.1-certified harmonic damper that is designed to eliminate torsional crankshaft vibrations throughout the RPM range, and is tunable to specific applications, such as this one. The specific COPO Super Damper we chose (P/N: 918427-16) features an aluminum 7.074-inch-diameter damper shell. The steel hub has a single 3/16 keyway, and the kit comes with an additional 4-rib pulley that can be bolted on the front. In the current configuration, we won’t be using that, since neither the LS nor the Coyote ran any accessories in their tested configurations.

The ATI Super Damper for the COPO engines is a really neat off-the-shelf part to work in our high-RPM application.
ARP Hardware Throughout
Obviously, in any of our high-performance engines, we utilize the best fasteners we can. For this project, we opted for ARP’s LS Main Stud Kit (P/N: 234-5608) to keep our crank securely in place. The connecting rods came with ARP2000 rod bolts, and we used ARP’s Billet Analog Stretch Gauge (P/N: 100-9942, which we featured in-depth previously here) to set them right where we needed.
When it comes to the crank bolt, for something like the LS that requires more than twice the torque of other crank bolts, we of course opted for ARP’s version (P/N: 234-2503). Sure the stock GM bolt is probably acceptable, but we consider it inexpensive peace-of-mind. We also used ARP cam bolts (P/N:134-1003), and ARP’s gorgeous 12-point stainless fastener kits for the front, rear, and valley cover plates. While not strictly necessary, they are of absolutely stellar quality, and they look damn good, too.

With the ARP2000 rod bolts covered in Ultra-Torque lube, 95 lb-ft got us to .0055-inch of bolt stretch, which is right between Manley’s recommendation of .005 and .006 inch.
Keeping The Oil Flowing
When it comes to high-RPM LS engines and the OE-style gerotor pumps, you’re pushing it. So, we made sure we stacked the deck in our favor to make this little science experiment live on the dyno. We started with a Melling OE-replacement high-volume oil pump (P/N: 10355) which will give us our best chance of success at our RPM goals.
Oil control is crucial in a performance engine, especially at elevated RPM levels. For that, we turned to Canton Racing Products. We started off with a rear sump pan (P/N: 15-274) that features four trap door baffles in a diamond configuration to keep oil at the pickup tube. It has an upper slosh baffle to help further control oil, and has been designed to work with the OEM windage tray.
We utilized the original full-length windage tray that came out of the LY2 — albeit with some significant elbow grease to get into a presentable state. Along with that, we used Canton’s oil pickup tube (P/N: 15-275) and OEM-style billet oil filter mount. We mounted the oil pan with a Cometic Street Pro oil pan gasket and Canton’s oil pan stud kit (P/N: 22-302).

Covering Everything Up
All of the bottom-end gaskets were included in our Cometic Street Pro Bottom End Gasket Kit (P/N: PRO1036B). To finish off the short-block, we used the original rear timing cover, with a new gasket from the kit, along with the new rear main seal from the kit. Up front, we opted for a new cover, simply because the old one was way too dirty. The same went for the valley cover, and both the valley cover and the front cover got new gaskets from the Cometic gasket kit. As mentioned earlier, all of the covers were attached with ARP’s 12-point stainless hardware and torqued to spec.
Now, in the video, you see the cam and timing set being installed. No, we didn’t forget about them in this article. They will be discussed in depth in the next installment where we cover the cylinder heads and valvetrain of LS5.0.

Let’s Talk Budget
In the interest of full transparency, it’s only right to discuss the budget. The fact is, the engines we are comparing against had a $9,999 budget… in 2015 (technically 2016 if you count when it was first published, as opposed to when everything happened). Since we have no way to check the prices of all of these parts from 8 years ago (hell, some of these part numbers didn’t EXIST eight years ago), and we know that the prices of things have changed drastically just since the project started, the only fair way to address this is to use prices at the time of publishing, and then adjusting the totals with the U.S. Bureau of Labor Statistics Inflation Calculator from January 2016 to May of 2024.
The January 2016 $9,999 budget adjusts to $13,255 today. So, let’s look at our short-block total. In today’s dollars, we have a total parts cost — including the core engine and machine work — of $5,494.93. Now, something to consider is, in the original competition, they specifically excluded the cost of machine work in the budget. So, if we remove that from the tally, our short-block total, in today’s dollars is $4,694.93. Adjusted to the 2016 budget, we’ve used $3,541.59 or about 35.5 percent of the budget. You’ll also notice in the itemized breakdown, we didn’t list a couple of things, like the new valley cover and front cover. That’s because they were included in the core engine, and new ones were only purchased for aesthetic reasons. The dirty old ones are still very much usable.
With LS5.0’s short-block complete, we’ll be moving on to the top end in the next installment. There, we’ll look at the work Lingenfelter did to our 799 cylinder heads and the COMP Cams valvetrain that goes with it.

If we’re playing by the original LS vs. Coyote rules, we can knock $800 off of that total, since they didn’t count machine work. Factoring in inflation over the past 8 years, we’re well under budget so far.


